Thanks for renting our screen. Please read through these instructions before using the product.
Fast Fold Screen User Instruction
- Dust, dirt, and scratches on the projection area will affect the picture’s quality. Take note of
the points below to prevent this.- Do not place it on a dirty floor
- Do not touch the projection area with your hands.
- Do not write or draw on the projection area.
- Do not use fingers or sharp objects to point at the projection area. This will damage the screen
fabric. - Use a soft, damp cloth or soft brush to clean the projection area if needed.
- Do not use chemical cleaning agents or alcohol to clean the projection area. Use clean water only.
- After using the screen, disassemble and store it in the aluminum storage box provided. Please fold the screen properly to fit its bag and place it on top of all the frames.
- The screen should only be operated by adults to avoid accidental damage and injury.
Assembly instructions
Frame
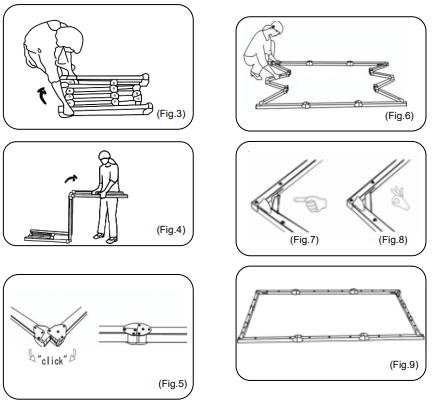
- Remove the frame from the box and place it on a CLEAN flat surface. Unfold the longer sections first. (Fig.3+4)
- Unfold the frame until the latch on the hinge ”clicks” into place. Repeat the procedure for the shorter sections. Fig.5+6)
- Ensure all 4 corners of the frame are at 90º, and the hinged support bar is straight and not bent. (Fig.7-9)
Attach the screen fabric
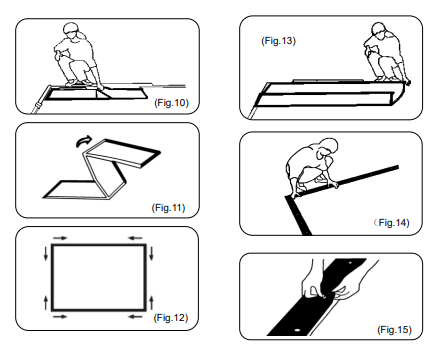
- Take the screen fabric out of the bag and put it inside the frame next to the corner. Unfold as shown in the diagram. (Fig.10+11)
- Once the screen fabric is fully unfolded, secure it to the frame by the press studs. Secure the press studs in the following order, first, the corners, then all around. Fig.12-15
Folding Legs
- Take the folding legs out of the box unfold them as shown in Fig.16, and make sure the hinges click into place.
- Once the legs are locked in place, use the hand screws to secure the support leg to the vertical leg in an appropriate position. The support leg can be adjusted to an Appropriate length. If the frame is attached to the legs higher up, then the support leg should also be attached higher up. (Fig.17+19) – This part only applies to our large fast-fold screen (144″x 81″). The Medium Size fast fold screen (120″x68″), and the small size fast fold screen (80″x45″) do not have the support leg part.

Attach the legs to the frame
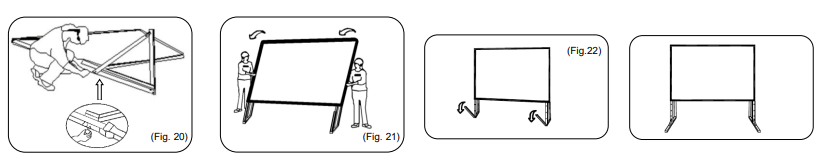
- Lay the frame on the floor and position the legs over the sides of the frame. Use the hand screws to attach the frame to the legs just a little before tightening two sides of them firmly. (Fig.20+21
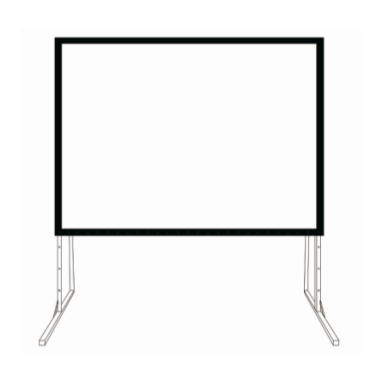
- When the frame is in the vertical position, fold the front-facing feet of the legs out. Assembly is completed, and the projection screen will be stable on a flat surface. (Fig.22)
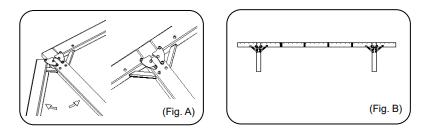
Dressup Kit Assembly Instructions
Take the Drape frame out of the storage box. Unfold the Drape frame and make sure the hinged support bars are straight and not bent. (Fig A & B)
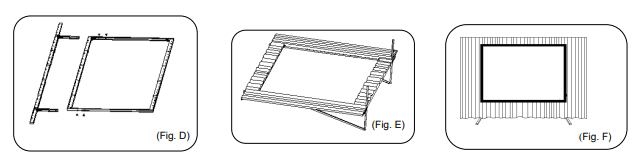
Tighten the Drape frame to the top of the main frame with M8X50 screws. (Fig. D)
Take the Drapes out of the box and secure the drapes to the Drape frame and the main frame by snapping the buttons. Make sure all the buttons must be snapped. (Fig. E)
Finish diagram for Drape kit version. (Fig.F)
If you rented other equipment from us, please check the following links
If you have more questions, feel free to contact us.
Email: [email protected] or Phone Number: +1 (604) 243 3356
